Fastlane 🚀 your Android App — Build and upload APK to Slack
Fastlane is a familiar tool in the iOS community. To put it in their words:
fastlane is the tool to release your iOS and Android app.
It handles all tedious tasks, like generating screenshots, dealing with code signing, and releasing your application.
So, take a minute to go through their main page if you are not familiar already.

It is a pretty impressive tool to automate almost everything. Although features are limited on the Android side as of now, their plugin system (called actions) is amazing. And I hope to see more features added soon. Best of all, it is open source. 🙌🏼
Supply and Screengrab are the two built in tools available for Android projects. I will talk about these tools in detail in upcoming posts. In this post, we will do our basics right. We will setup fastlane in our Android project and write our first Fastfile to build our app and upload the generated APK to your Slack channel.
We at Playo use Slack everyday (and I guess almost all of you do) and I (as Android Dev) upload APKs to the #apks channel for internal distribution and testing. We also have multiple flavours of the app that needs to be built, signed and uploaded to the channel. So I thought its the time to automate this process using Fastlane.
Installing Fastlane
Fastlane is written in Ruby and is available as a ruby gem. So technically, any OS, with ruby installed, can run it. However, the official documentation has support and instructions only for macOS. The easiest way to get started is using Homebrew.
brew cask install fastlaneAfter successful installation, add the below lines to your shell profile (typically ~/.bashrc or ~/.bash_profile or (if you are like me) ~/.zshrc).
export PATH="$HOME/.fastlane/bin:$PATH"
export LC_ALL=en_US.UTF-8
export LANG=en_US.UTF-8
That’s it! You are good to go. Navigate to your project folder and initialise fastlane.
fastlane initThis command initialises fastlane by creating a folder fastlane and two important files.
Appfilewhich defines configuration information that is global to your appFastfilewhere you define your automation tasks calledlanes
You might want to keep these files in source control to share with others. More on this here.
Build and Upload APK to Slack
Let’s work on the stuff that matters — configuring fastlane to automate what we need. Take a minute and look at the Fastfile. Those who are familiar with Rails syntax can easily understand the contents (after all it is Ruby). By just reading the generated file we can understand that it is checking for version of fastlane, setting default platform to Android, and under platform Android there are several lanes defined. Each lane uses some actions to perform tasks.
We are going to focus on two main actions: gradle and slack. These actions offer a lot of common tasks that we come across everyday. For example building different flavours of our app and posting updates to slack. So we are going to leverage these commands and get our stuff done.
First step is to configure our slack workspace url. This is not the url to your workspace. It is the incoming webhook url. You can get one after installing incoming webhook app in your workspace. Select the channel (or direct message) you want to post the APK to and generate the url. Update the url in before_all block.
ENV["SLACK_URL"] = "https://hooks.slack.com/services/...If you notice other sections of the Fastfile, you can see that it is using gradle and slack commands like this to perform Android builds and post messages to Slack.
# Gradle command to run the task assemble in Release mode
gradle(task: "assembleRelease")# Posts a message to slack channel (as configured in SLACK_URL)
slack(message: "Build Done!")
For signing the app with release key, you might want to check the gradle action documentation.
gradle(
    task: "assemble",
    build_type: "Release",
    print_command: false,
    properties: {
        "android.injected.signing.store.file" => "keystore.jks",
        "android.injected.signing.store.password" => "store_password",
        "android.injected.signing.key.alias" => "key_alias",
        "android.injected.signing.key.password" => "key_password",
    }
)
By just defining our gradle and slack actions, our goal is accomplished. Oh wait! there is no option to upload files using the built in slack action. Now we have to write something on our own. As I mentioned earlier, Fastfile is just a Ruby script. So after a few minutes with my dear friend Google, I figured out a way to upload the APK to slack channel.
# Add this to your Fastfile
desc "Upload the APK to Slack channel"
private_lane :upload_to_slack do |options|
  file_path = lane_context[SharedValues::GRADLE_APK_OUTPUT_PATH]
  file_name = file_path.gsub(/\/.*\//,"")
  sh "echo Uploading " + file_name + " to Slack"
  sh "curl https://slack.com/api/files.upload -F token=\"token\" -F channels=\"#channel\" -F title=\"" + file_name + "\" -F filename=\"" + file_name + "\" -F file=@" + file_path
end
This is a helper method which picks up the APK that is built by the gradle action and upload it to Slack’s upload API. Note the key words lane_context — provided by Fastlane to access variables which are in context to the current lane under execution and GRADLE_APK_OUTPUT_PATH — provided by gradle action to locate the APK. There are few more context variables provided by these actions. Refer to documentation for more details.
To use the above method, you need an access token for your Slack workspace. Go to the Legacy token generator page and generate token for your workspace. Update the token value and destination #channel (or @username for private message) in the above method. Finally our lane looks like this.
lane :slackbuild do
gradle(task: "assembleRelease")
slack(message: "Build Successful!")
upload_to_slack()
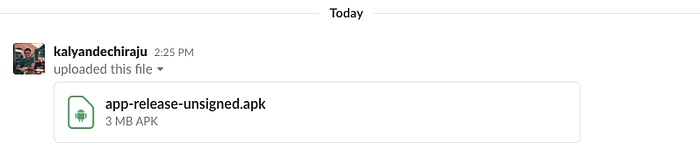
endWe are ready to run our first fastlane build and see the APK in slack. You can execute your lane using the below command.
fastlane slackbuild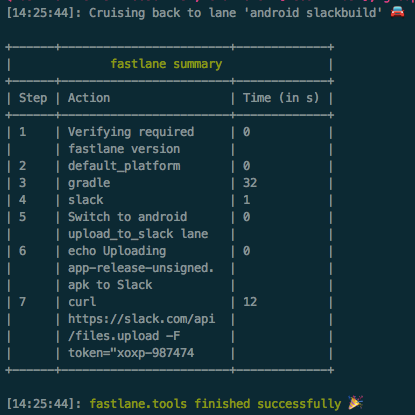
This is just the tip of the iceberg. Once you understand the flow of fastlane, we can add even more functionality and improve our development process using fastlane. That’s it for this post. See you all in the next one.

